
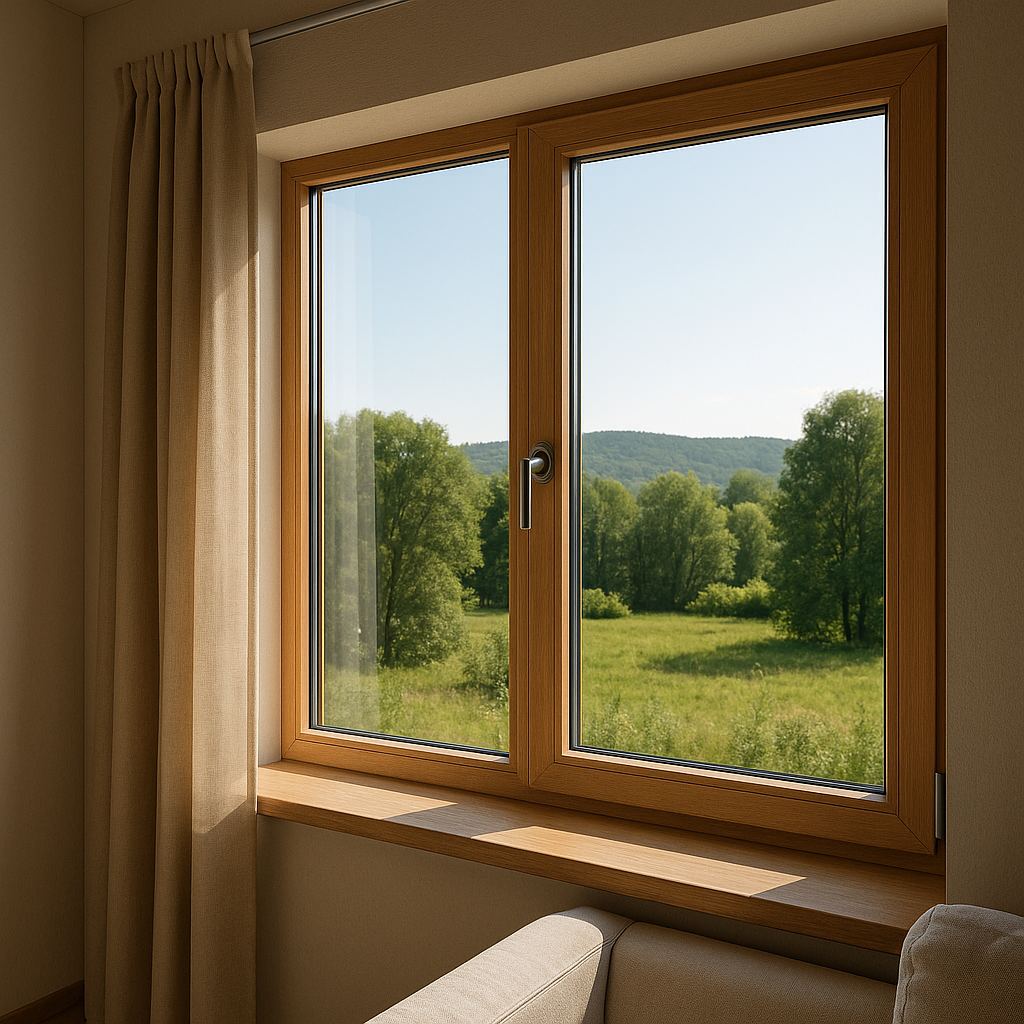
Low-emissivity glazing is only as good as the way it’s installed. You can choose the best product, get the right frame system, and still lose many low E glass benefits if the coating is facing the wrong direction or placed on the wrong facade.
Orientation is not just a detail—it is a performance driver. In this article, we’ll unpack why orientation matters so much, how it affects energy savings and comfort, and what architects, installers, and homeowners should check before the glass goes into the frame.
How Low-E Glass Works – And Why Direction Matters
Low-E glass carries a microscopically thin layer of metals (often silver) that changes how the glass handles heat and UV:
- It reflects long-wave infrared (heat) back toward its source.
- It blocks much of the UV radiation, helping protect finishes and fabrics.
- It still allows a controlled level of visible light to pass through.
Because that coating works like a thermal mirror, which side of the glass it faces and which direction the window faces both change how those low E glass benefits show up in real buildings:
- In winter, you want heat generated indoors reflected back inside.
- In summer, you often want solar heat reflected away before it can load the interior.
- In mixed climates, you want a finely tuned balance between heat gain and heat loss.
Get the orientation wrong, and the coating can end up working against your design goals.
Two Kinds of Orientation That Control Low E Glass Benefits
When people talk about orientation for Low-E glazing, there are really two layers to think about.
1. Surface orientation inside the insulating unit
In a double- or triple-glazed unit, each face of glass is numbered:
- #1 surface – outdoor face of the exterior pane
- #2 surface – cavity face of the exterior pane
- #3 surface – cavity face of the interior pane
- #4 surface – room-side face of the interior pane (in double glazing)
Where the Low-E coating sits (usually on #2, #3 or #4) changes:
- How much solar heat is admitted (SHGC)
- How strongly the window holds indoor heat
- The risk of external condensation
- The appearance (reflectivity and tint)
For example:
- A solar-control Low-E on the #2 surface is good for hot climates: it reflects solar heat before it enters the cavity.
- A high-gain Low-E on the #3 or #4 surface suits cold climates: it lets in solar gain but reflects room heat back inside.
If the unit is installed flipped—say, the soft coat meant for #2 ends up toward the room—you can lose much of the intended performance.
2. Facade orientation to the sun
The cardinal direction of the opening matters just as much:
- North facades (in the northern hemisphere) get minimal direct sun; orientation choices here focus on insulation and daylight.
- South facades receive the strongest, most predictable solar exposure – perfect for tuned SHGC.
- East and West facades are prone to low-angle, high-glare sun and risk of overheating.
Matching the Low-E coating type and surface location to each facade is where the real low E glass benefits are unlocked.
Key Low E Glass Benefits That Depend on Correct Orientation
1. Thermal efficiency and energy savings
The headline benefit of Low-E glazing—lower heating and cooling loads—can be undermined if the coating is in the wrong place.
Correct orientation:
- Lowers U-value by reflecting radiant heat back to its source.
- Optimises SHGC for each facade (higher where you want free solar gain, lower where overheating is a risk).
- Reduces HVAC run-time and peak loads, improving system life and operational cost.
Incorrect orientation can:
- Prevent useful winter solar gain on south facades.
- Trap unwanted summer heat on west facades.
- Generate uncomfortable perimeter zones that occupants then “fix” by cranking thermostats—erasing efficiency gains.
2. Comfort and surface temperature
Occupants judge windows by how they feel, not by the spec sheet. When oriented correctly, Low-E coatings:
- Keep interior glass surfaces warmer in winter and cooler in summer.
- Reduce cold downdrafts and radiant chill near glazing.
- Limit hot spots where sun patches create uncomfortable contrasts.
When a unit is installed backwards or not matched to facade orientation, those comfort benefits fall off quickly. You see more:
- Draught complaints near big glazing.
- Occupants moving desks away from windows.
- Ad-hoc blinds and curtains left closed all day, cancelling your daylight strategy.
For a broader look at how performance ties back into overall building form and modelling, see how Why Low E Glass Benefits Influence Architectural Models frames Low-E glazing as a key design variable rather than a late-stage product choice.
3. UV protection and fade control
Correctly oriented Low-E coatings block a large share of the UV spectrum that causes fading in:
- Timber flooring
- Fabrics and carpets
- Artwork, display materials and hotel fit-outs
If the coating is on the wrong surface or the wrong product is used on a highly exposed facade:
- UV can bypass the coating more easily.
- Fade rates accelerate on east and west elevations.
- Retail or hospitality spaces may need more frequent refurbishment.
4. Glare and daylight balance
Low-E coatings designed for daylight-driven designs often have specific visible transmittance (VT) and reflectance profiles. Orientation affects:
- How much direct sun hits the glazing.
- Whether reflections become distracting to neighbours or drivers.
- How consistently diffuse daylight penetrates deep into the plan.
If you’ve already tailored your facade to daylighting targets, check out Which Low E Glass Benefits Reduce Interior Glare? to see how coating selection and orientation tie into glare control strategies.
Why “Right Orientation” Starts Before the Glass Arrives
Orientation decisions shouldn’t wait until installation day. To preserve all those low E glass benefits, the workflow should look like this:
1. Design phase: model by facade, not “one glass fits all”
- Use climate data and building simulation to set target U-value and SHGC ranges by facade.
- Select different Low-E products or coating positions where needed—e.g. higher-gain Low-E on south, stronger solar control on west.
- Document not just “Low-E IGU” but the exact surface that carries the coating.
This is also where you decide how Low-E interacts with slim frame systems and minimalist openings discussed in Where Low E Glass Benefits Support Minimalist Window Designs.
2. Specification and submittals: make orientation unambiguous
A surprising number of on-site errors come from ambiguous documentation. Good specs should:
- State coating location clearly (e.g., “soft-coat Low-E on #2 surface”).
- Include diagrams showing which side faces out.
- Tie product choices back to facade directions (N/S/E/W).
For a deeper dive into why this level of clarity matters, Why Low E Glass Benefits Depend on Correct Installation outlines the risk pathways from vague documentation to lost performance.
3. Frame and glazing system: support the orientation
Even with perfect drawings, the frame system can undermine performance if it isn’t designed and installed properly. Well-designed frames:
- Provide consistent drainage and ventilation paths so seals and coatings aren’t attacked by trapped moisture.
- Maintain the specified cavity depth to hit the thermal performance the Low-E glass was chosen for.
- Avoid metal bridging that creates cold spots along the edge.
Correctly detailed and installed frames are a big part of why Where Low E Glass Benefits Improve If Frames Install Well emphasises frame–glass integration as a single system rather than two separate components.
On-Site Practices That Protect Low E Glass Benefits
Even a perfect specification can be undone on site. A few critical checks help keep orientation correct in the real world.
1. Labelling and handling of IGUs
- Make sure units arrive with clear orientation labels: “THIS SIDE OUT” or “LOW-E COATING INSIDE.”
- Train crews to never flip units just to make bedding “easier” in a tricky frame.
- Avoid rough handling that could crack seals or scuff the coated face if it’s exposed.
2. Verifying coating position before install
Glaziers can use simple tools such as:
- Low-E detectors to confirm which surface has the coating.
- Polarised sunglasses and test lights to visually confirm coating presence.
A quick test at the scaffold can prevent years of compromised low E glass benefits if a batch was fabricated incorrectly or delivered inverted.
3. Attention to edge sealing and tolerances
As covered in more depth in Which Low E Glass Benefits Fail When Installation Is Poor?, sloppy sealing and tolerances can lead to:
- Moisture infiltration and seal failure, fogging the cavity.
- Thermal bridging at the perimeter, which reduces the effective U-value.
- Localised stresses that shorten IGU life.
Correct orientation without correct sealing still means lost performance over time, so both need to be treated as critical.
How Orientation Connects to Environment and Landscape
Orientation decisions don’t exist in a vacuum. They’re tied directly into:
- Local micro-climate – wind patterns, shading, and reflectance from nearby surfaces.
- Landscape features – trees, water bodies, and topography that affect solar exposure and views.
When planning a facade, it’s worth stepping back to see how glazing interacts with the broader setting, in the same way landscape professionals think about context in What Defines a Natural Landscape and Its Core Features. The more precisely you understand sun paths, shade from surrounding elements, and reflected light, the more accurately you can orient Low-E surfaces for maximum benefit.
Practical Checklist: Getting Orientation Right
Here’s a quick, project-ready checklist to help ensure you’re actually getting the low E glass benefits you’re paying for:
- By facade, define goals
- Cold climate south facade: maximise solar gain, minimise losses.
- Hot climate west facade: minimise solar gain, maintain daylight.
- Specify coating type and surface
- Note “soft-coat Low-E on #2 surface” (or #3/#4) in drawings and schedules.
- Use different specs for different facades if needed.
- Coordinate with frame manufacturer
- Confirm compatible spacers, sealants, and cavity depths to preserve performance.
- Review shop drawings and mock-ups
- Verify orientation in mock-ups under real sun conditions.
- Check U-value and SHGC against energy model assumptions.
- Train site crews
- Explain why orientation matters—don’t assume they know.
- Provide visuals and simple rules: “Low-E sticker always to room side,” etc.
- Inspect during installation
- Randomly test units with a Low-E detector.
- Check for flipped IGUs, incorrect frame bedding, and compromised seals.
- Plan maintenance
- Specify non-abrasive, non-ammonia cleaners.
- Include inspection intervals to catch early seal failures or film issues.
Conclusion: Orientation Turns Specs into Real-World Performance
Low-E technology promises a long list of advantages—lower energy bills, better comfort, UV protection, and higher property value. But those low E glass benefits are never guaranteed just because the specification says “Low-E IGU.” They depend on:
- The right coating on the right surface
- The right glass on the right facade
- The right frame detailing and on-site installation
When orientation is handled carefully from concept through construction, Low-E glass stops being just a product label and becomes a reliable, predictable part of your building’s performance toolkit.