
Correct specification is only half the battle. Even the best low e glass types will underperform—or fail prematurely—if they’re not handled, oriented, glazed, and sealed correctly on-site. For contractors, facade installers, and project managers, installation is where energy models meet reality.
This guide walks through what ensures low e glass types are installed correctly on-site, from pre-delivery checks to final cleaning, so your glazing delivers the thermal, visual, and comfort performance the design promised.
1. Start With the Right Product and Clear Documentation
Good installation begins before the first crate is opened.
Confirm Product vs. Specification
On delivery, site teams should verify that the glass arriving on-site matches the architect’s and facade engineer’s specification:
- Correct low e glass types (soft-coat vs hard-coat, solar-control vs passive)
- Right thicknesses and IGU build-ups
- Correct subtrate (clear, tinted, or low-iron glass)
- Any lamination, frits, or special treatments
This is where coordination with design documents like Why Low E Glass Types Be Specified Carefully by Architects really pays off—clear specs reduce confusion and changes on-site.
👉 Why Low E Glass Types Be Specified Carefully by Architects
Check Coating Position and Edge Markings
Most manufacturers label:
- Which surface carries the low-E coating (e.g., surface #2 or #3 in an IGU)
- Which side must face indoors or into the cavity
Installers should be trained to read these markings so units are not accidentally rotated or flipped, which can wreck solar performance and cause visual mismatch.
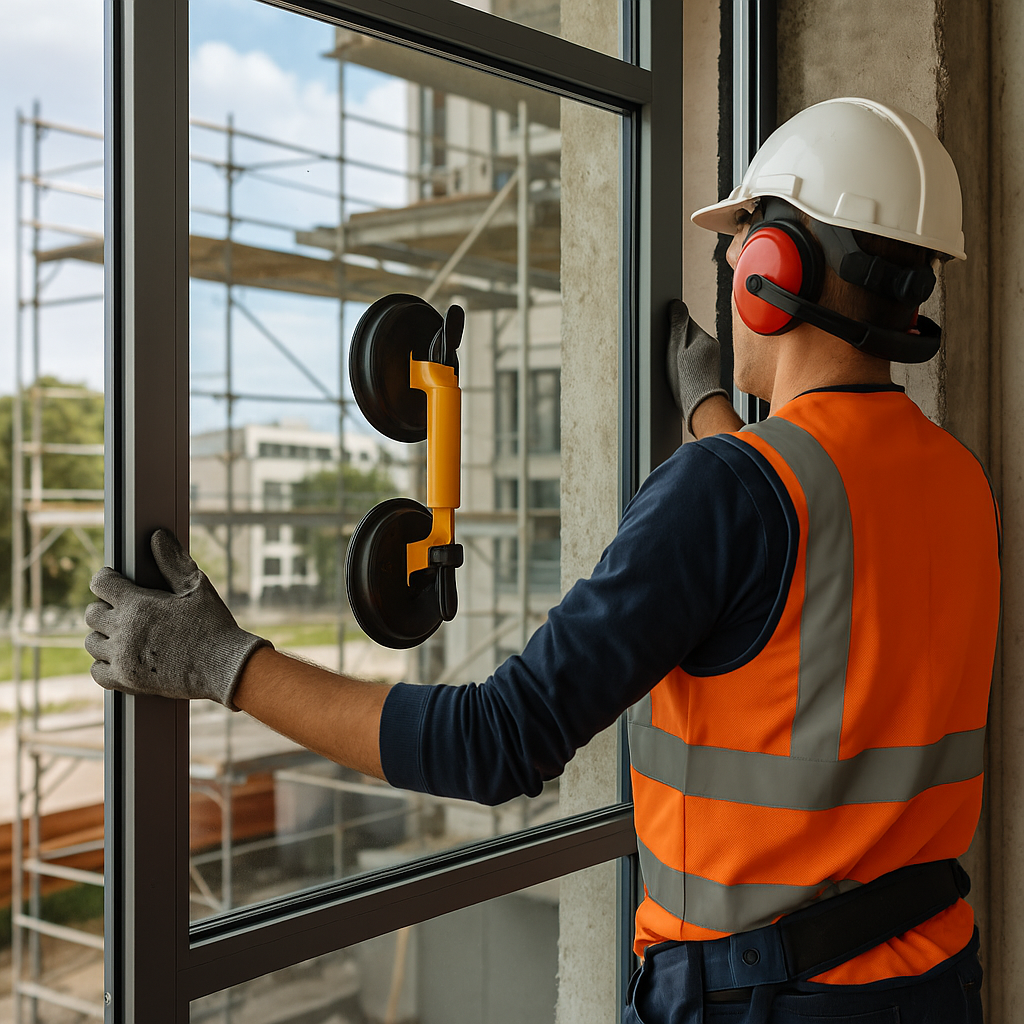
2. Correct Handling Protects Delicate Low E Coatings
Although soft-coat low-E is protected inside the IGU cavity, mishandling can still cause damage:
- Use proper lifting gear – suction cups, cranes, and A-frames rated for the glass size and weight.
- Avoid edge impacts – chips can compromise seals and lead to gas loss or fogging.
- Keep crates dry and ventilated – prolonged exposure to standing water can stain edges and encourage seal failure.
For projects where you’re deciding between low-E and more robust reflective products, it helps to understand their physical differences:
👉 What Distinguish Low E Glass Types From Reflective Coatings?
3. Orientation: Getting Low E Glass Types the Right Way Around
One of the most common on-site mistakes is incorrect orientation of coated glass.
Know Your Surface Numbering
In an IGU:
- Surface #1 – outside face of the exterior pane
- Surface #2 – inside face of the exterior pane
- Surface #3 – outside face of the interior pane
- Surface #4 – room-side face of the interior pane
Typical patterns:
- Solar-control low e glass types → coating on surface #2 to reflect solar heat before it enters the cavity.
- Insulating low-E in cold climates → coating often on surface #3 to reflect room-side radiant heat back inside.
If units are rotated 180° or installed backwards, you may get:
- Higher heat gain than expected
- Poor winter insulation
- Color or reflectance differences across the facade
Site checklists should explicitly include “Confirm coated surface orientation before setting glass.”
4. Frame Preparation and Tolerances
Even perfect glass fails in a poor frame.
Ensure Clean, True Frames
Before glazing starts:
- Check frame squareness, plumb, and level
- Remove debris, metal swarf, and contaminants
- Verify drainage and weep holes are open and unobstructed
If frames are twisted or dirty, loads can concentrate on corners, stressing the IGU and compromising seals over time.
Use Correct Setting Blocks and Packers
Correctly sized and placed setting blocks ensure:
- Balanced dead load support
- Proper edge cover and bite
- Space for thermal movement
For larger units and heavy laminated low-E, follow manufacturer’s tables for block size and location.
5. Sealants, Gaskets, and Air-Tightness
A high-performance IGU only works when air and water stay where they belong.
Compatible Sealants
Low-E and IGU edge seals can be sensitive to certain chemicals. Always:
- Use sealants tested and approved by the glass or IGU manufacturer
- Avoid untested silicones, solvents, or aggressive cleaners around edge seals
- Follow cure times before applying structural loads or weather exposure
Continuous Gaskets and Proper Compression
Rubber gaskets and pressure plates must:
- Run continuously around the perimeter, with properly sealed joints
- Have the right compression—not so loose they leak, not so tight they crush the unit
Good air-tightness helps the building achieve the energy balance you targeted in design—especially important in mixed climates where both heating and cooling efficiency matter.
👉 What Help Low E Glass Types Deliver Balance in Mixed Climates?
6. On-Site Environmental Controls
The installation environment itself can make or break performance.
Temperature and Weather
Where possible:
- Avoid glazing in heavy rain, dust storms, or high winds.
- Respect manufacturer temperature limits for sealant application and curing.
- Protect installed units from construction splatter (concrete, paint, grinding dust).
Protection From Construction Damage
Low e glass types should be shielded from:
- Welding sparks and cutting debris
- Cement wash, plaster, or brick-cleaning acids
- Abrasive tools used nearby
Temporary protection films can be helpful, but make sure they are approved for use on coated glass and removed within the recommended timeframe to avoid adhesive residue.
7. Special Considerations for Laminated and Large-Format Low E Glass
Many modern facades combine low-E with lamination or oversized panes.
Laminated Low E Glass Types
These are often used where:
- Safety or security glazing is required
- Noise reduction is important
- Impact or fall protection is needed
Because laminated units are heavier, installers must:
- Use appropriate lifting equipment and anchors
- Confirm frame and fixing systems are structurally designed for the higher loads
Where you’re using lamination for safety and performance, refer to detailed guidance such as Which Safety Needs Require Laminated Low E Glass Types? (from your earlier series) to make sure on-site decisions match design intent.
8. Quality Control: Testing and Inspection on Site
A formal QA process helps catch small issues before they become expensive failures.
Visual Checks
After glazing each area:
- Inspect for scratches, scuffs, or coating defects visible from standard viewing distances
- Check for roller wave, distortion, or mismatch in color/reflection between neighbouring units
- Verify that spacer bars are aligned and gas-fill or certification marks are consistent
Performance and Envelope Testing
On larger projects, consider:
- Blower door tests to check air-tightness
- Thermal imaging during commissioning to detect cold bridges or failed seals
- Water penetration tests at facade mock-up and early installation stages
9. Cleaning and Long-Term Maintenance of Low E Glass Types
Even after handover, cleaning practices can affect low-E performance and appearance.
Safe Cleaning Methods
- Use mild detergent and clean water with soft cloths or squeegees.
- Avoid abrasive pads, blades, or strong alkaline/acidic cleaners.
- Never dry-scrub construction dust; always pre-wet the surface.
If, for any reason, the low-E surface is exposed (e.g., single glazing in specialty applications), cleaning instructions must be strictly followed to avoid scratching the coating.
Maintenance Planning
Owners and facility managers should receive:
- Manufacturer cleaning guidelines
- Recommended inspection intervals for seals, gaskets and frames
- Instructions for replacing damaged units without disturbing adjacent glass
This preserves the long-term energy and comfort benefits that justified the investment in low e glass types in the first place.
10. Integrating Glass Installation With Facade and Site Design
Finally, correct installation is most successful when coordinated with broader architectural and landscape decisions:
- Shading devices, balconies and fins reduce peak solar loads on glass, easing mechanical demands.
- Landscape elements (trees, pergolas, water features, paving choices) influence reflected light and heat and can protect ground-level glazing.
- Access routes and scaffolding design determine whether large units can be safely brought into position.
Thinking about glazing, structure and outdoor environment as a single system reflects the same integrated mindset used in contemporary landscape architecture. For broader design context, see:
👉 Define Landscape Architecture for Modern Design Work
Conclusion: Installation Is Where Performance Becomes Real
Specifying advanced low e glass types is only the beginning. To ensure they deliver:
- Stable indoor temperatures
- Lower heating and cooling loads
- Protection from UV and better comfort for occupants
you must install them correctly on-site.
That means:
- Verifying product and coating orientation
- Handling and glazing with care
- Using compatible sealants and well-prepared frames
- Controlling site conditions, testing performance, and planning maintenance
When architects, facade engineers, and installers align around these steps—and when they understand how low-E differs from other options like reflective coatings—the result is a building envelope that performs as designed: efficient, comfortable, durable, and visually coherent for decades.